This step-by-step guide will help you setup port forwarding for any application you may need on your E Street DSL network. Port forwarding tells your Actiontec DSL router where to forward specific protocols and incoming TCP/UDP traffic to on your network. Some common applications that you may be trying to setup include Peer-to-Peer network file sharing (PtoP), Remote Control applications such as PCAnywhere or Timbuktu, FTP serving, WebCams, mIRC DDC, etc.
To enable port forwarding you must have a static IP address setup on the Actiontec and/or your internal LAN. You can set port forwarding from a statically assigned Actiontec router (e.g.: 1 static IP address) to a statically assigned IP inside your network, or you may also port forward from a statically assigned Actiontec router to a NAT (dynamically assigned) address (192.168.0.x) within your network as well.
NOTE: this tutorial will require you “Save & Restart” your DSL router after the configuration – before you begin be sure you have your E Street DSL login username and password and DSL router configuration information. If the information is not retained when your router restarts – you may have to re-enter this information.
Step 1:
Open the web browser of your choice, and type 192.168.0.1 in the address bar and [ENTER].
You should get the following Actiontec configuration menu.
Step 2:
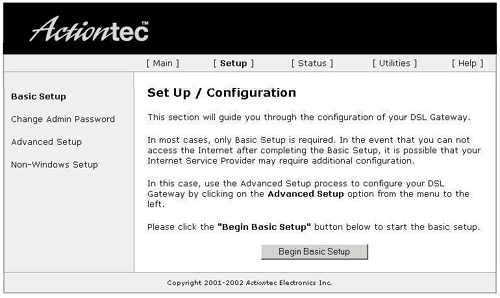
Click “setup/configuration”. You should see the following menu.
Step 3:
Click “advanced setup” on the left hand side. You should see the following menu.
Step 4:
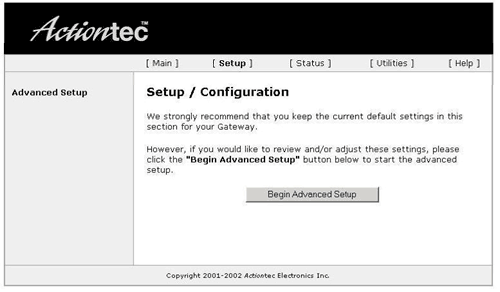
Click “begin advanced setup”. You should see the following menu.
Step 5:
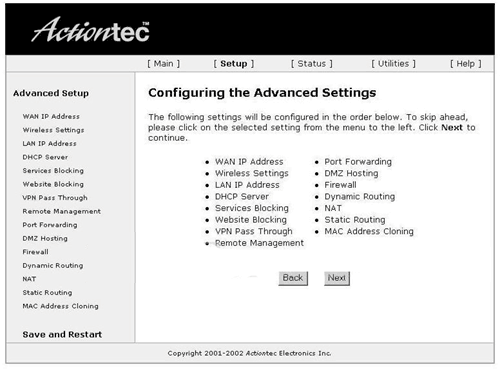
Click port forward on the left hand side. You should see the following menu.
Step 6:
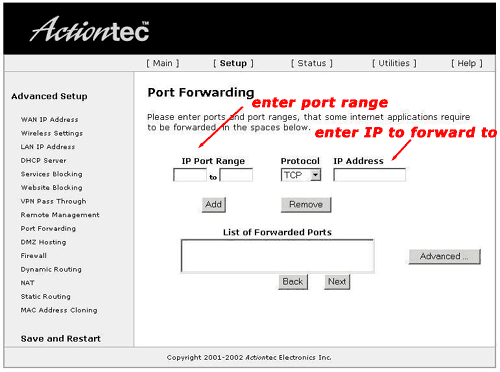
This is where you do your actual port forwarding configuration. Enter the port range you wish to forward in the “IP Port Range” box. The lowest numbered port should go in the box on the left, and the highest numbered port should go into the box on the right. Set the port protocol that will be used. If both TCP and UDP need to be selected, you actually need to make a duplicate configuration. One configuration will have TCP selected, the second one will have UDP selected. In the IP Address box enter the IP address/NAT address you wish to forward these ports to. Click Add to save your settings.
When the configuration is added click “next” until you get to the “Save and Restart” screen – click “Save and Restart – your router will reboot into the new configuration.
With this port forwarding set, the IP address of the Actiontec router will “port forward” incoming traffic to the node or internal IP address you have assigned it to.
You have now set DSL port forwarding for your trouble-free computing pleasure Good job! (contact support@estreet.com for E Street consulting services for your LAN if the installation is not so trouble-free)


