The following article explains how to edit your name servers in your computer’s network connection properties.
Name servers (DNS) are a set of servers that map human-readable names (like “estreet.com”) to the associated IP addresses out on the internet. Sometimes the name servers in your computer’s connection properties need to be edited to resolve connectivity.
For recommended Best Free and Public DNS Servers see This Article.
———————————————————————————————————-
Windows 10 & 11
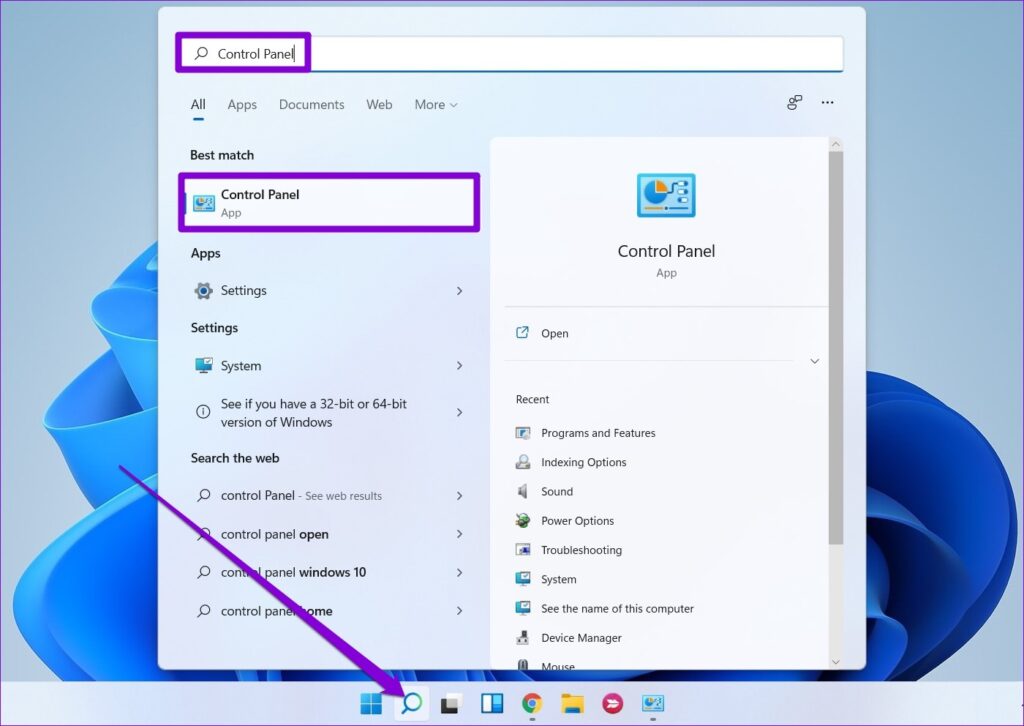
Step 1: Click on the Search icon on the Taskbar in Windows 11 (or Windows menu or search window in Windows 10), type in control panel, and select the first result that appears.
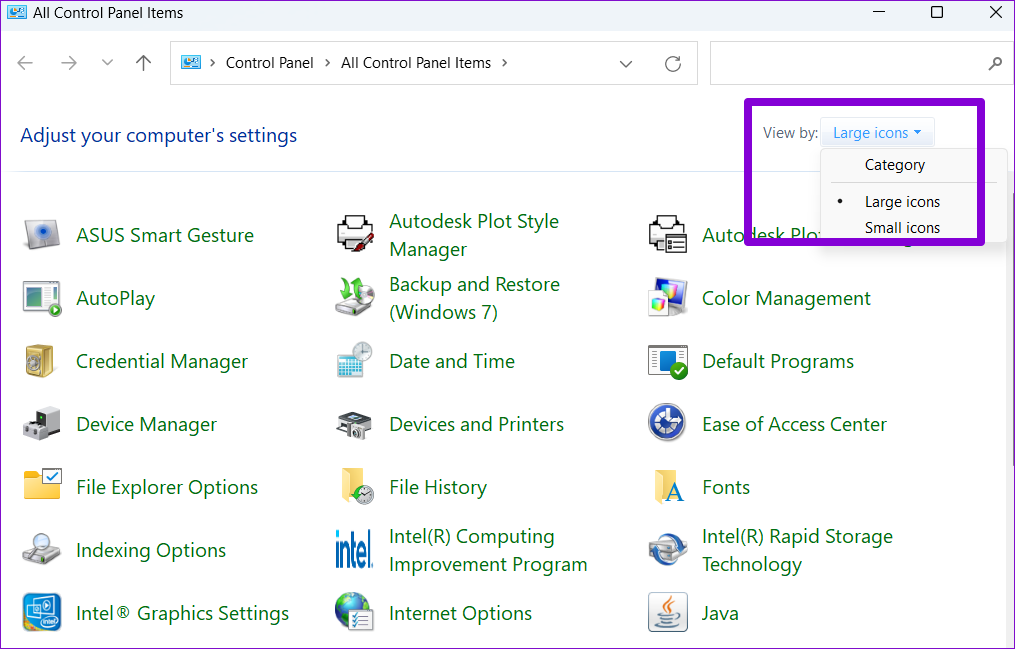
Step 2: Use the drop-down menu in the top right corner to change the view type to large or small icons.
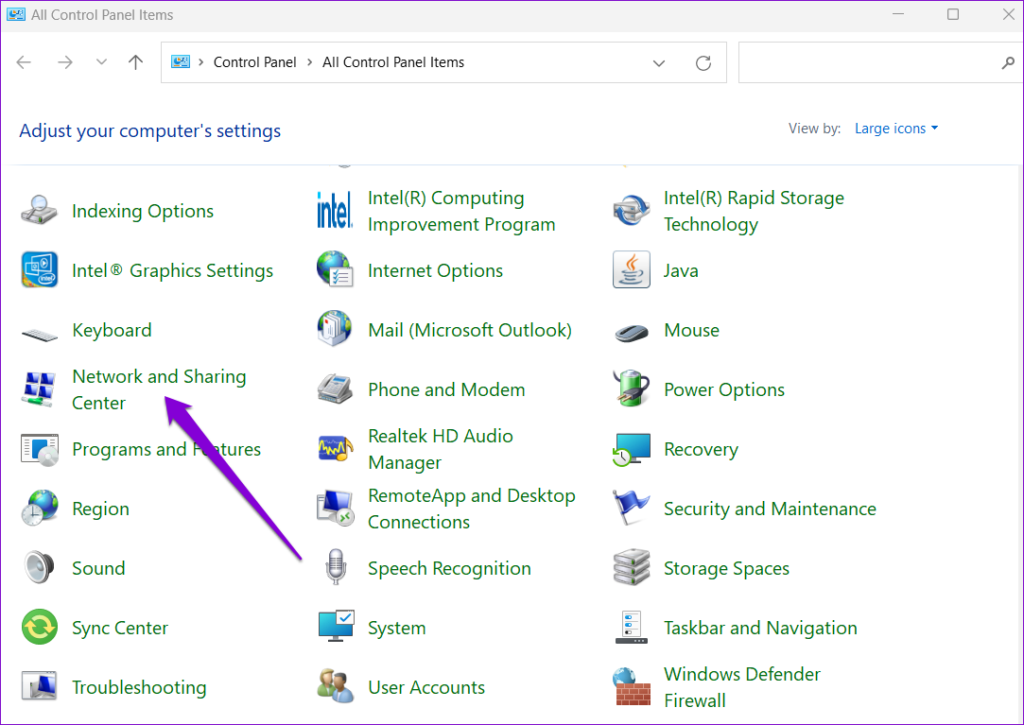
Step 3: Go to Network and Sharing Center.
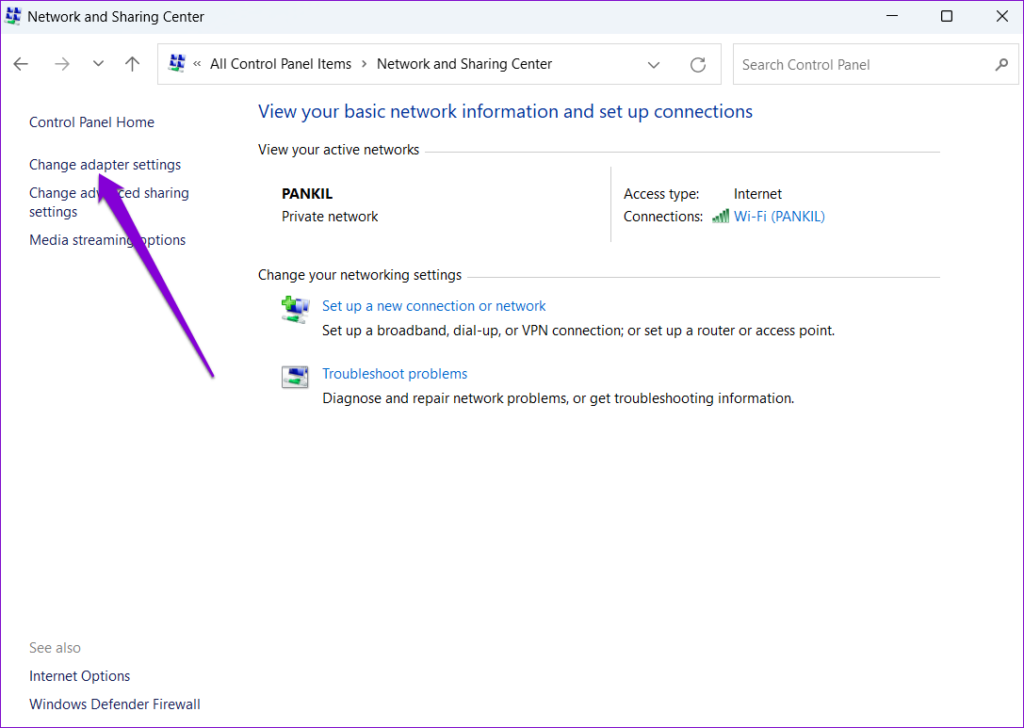
Step 4: Click on Change adapter settings on your left.
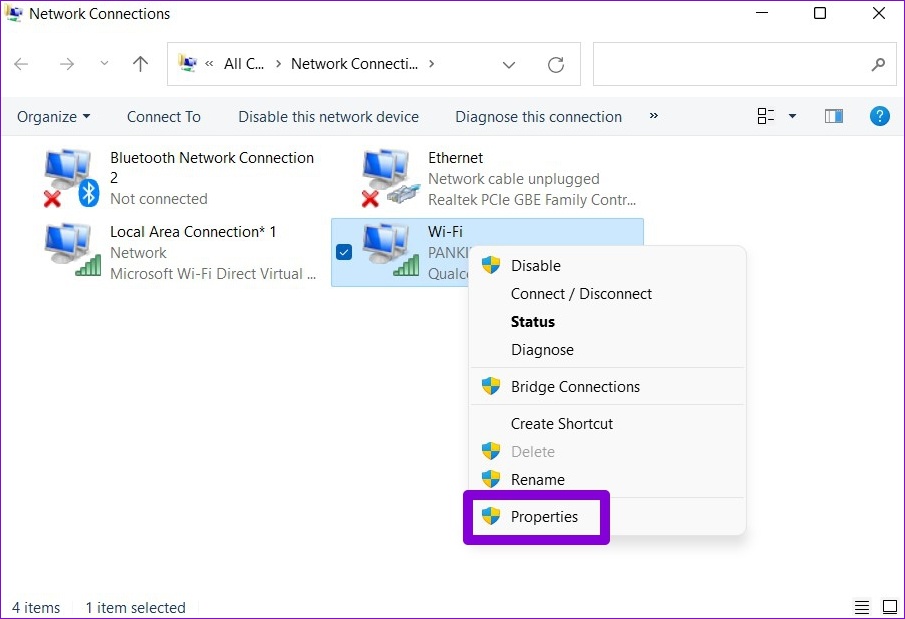
Step 5: Right-click on your internet connection and select Properties.
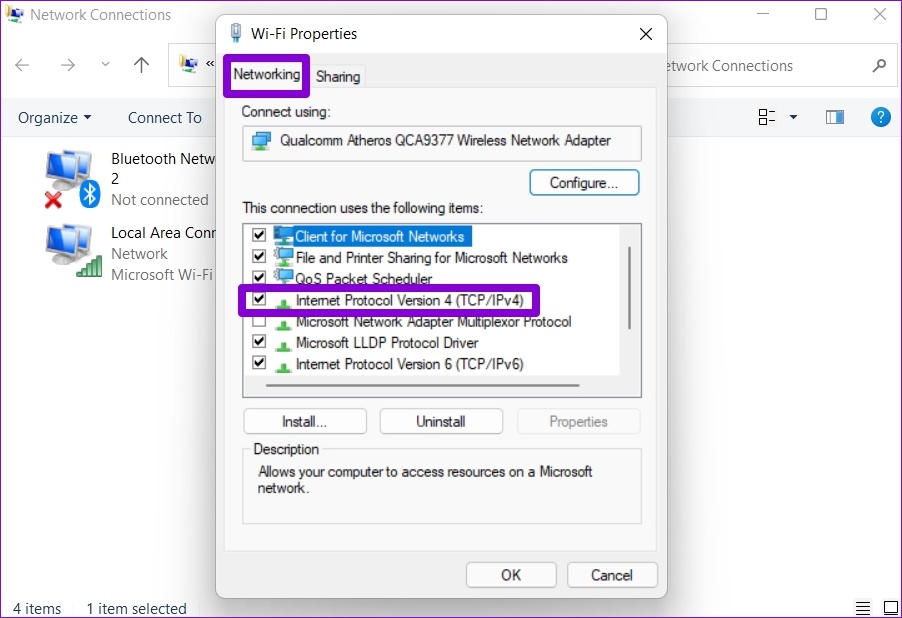
Step 6: Under Networking, double-click on ‘Internet Protocol Version 4 (TCP/IPv4)’ to open its Properties.
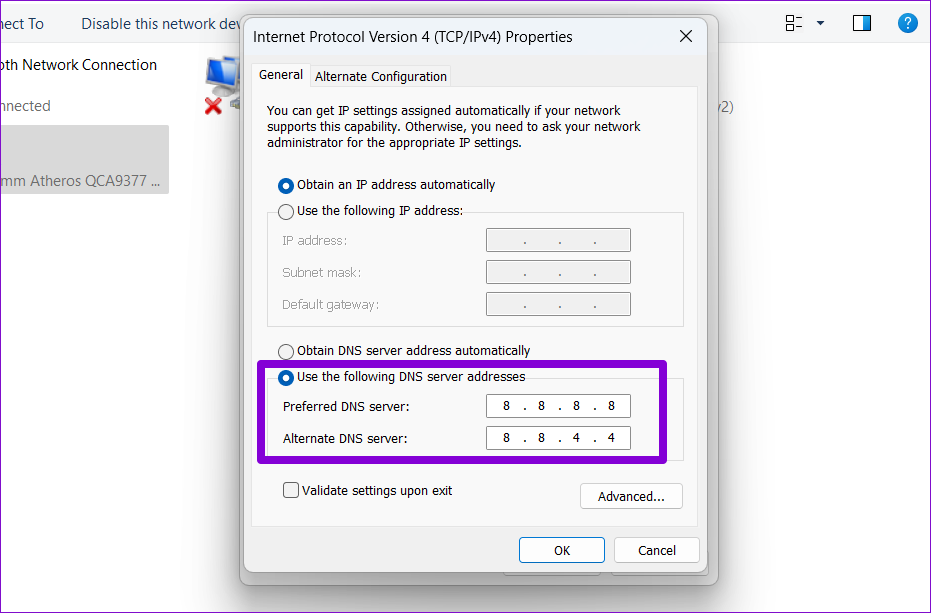
Step 7: Select the ‘Use the following DNS server addresses’ option. Enter primary and secondary DNS addresses in the Preferred DNS Server and Alternate DNS Server fields, respectively.
click on OK to apply.
————————————————————————————————————
Mac OS X
1. Click on the Apple menu and select “System Preferences”.
2. Click on the “Network” icon.
3. Highlight the connection that you’re currently using (either “Airport” or “Built-in Ethernet”) and then click “Advanced”.
4. On the “DNS” tab you’ll see a box labeled “DNS servers”. Any servers listed in gray text are provided by your ISP and/or router and cannot be edited here. Any name servers that appear in black text can be edited.
5. To add our name servers, click the plus sign “+” and then enter the name server you’d like to add. Hit the plus sign again to add a second name server. Choose the appropriate name servers from the options below.